Step 1
Estimating the Length of the Bezel for a oval Stone and the
desired size shank.
To estimate the
length of the shank, do the following calculation:
Diameter + Thickness of metal x PI (3.1416)
D+TM×π=RB
Estimating the Length of the Bezel for a Oval Stone
To estimate the
length of the bezel for an oval stone, do the following calculation:
Length + Width ÷ 2 + thickness of metal x PI (3.1416)
L+W÷2+ TM×π=OB
After all calculations are obtain draw an H shape template
for the ring.
Transfer a ring template that is slightly smaller than the
bezel you are using to 18 ga sheet metal. The template can be made out of thick
paper first and taped together to refine the shape of the ring.
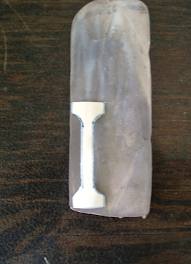
Step 2
The metal blank is bent with pliers into the shape, taking
care not to warp the four shortest edges. These edges are then soldered
together one at a time using hard solder.
Step 3
The shank of the ring is trued round using a ring mandrel.
The top opening (where your bezel will sit) is then formed to the desired shape
(oval in this case) and planished using the R-3 Raising Stake.
Step 4
Using the R-3 Stake, the ring shank and sides are domed. To
dome the sides, the round end of the stake is inserted into the top opening of
the ring and planished gradually from the outside. As the metal stretches, it
will dome up. The ring shank is then domed by forming the metal around the
rounded end of the stake.
Step 5
The bezel is ready to be soldered into the top of the ring.
It may be necessary to refine the shape and size of the top opening to
accommodate the bezel. Once the bezel fits tightly, it is soldered in place.
Don't forget to drill a hole in the base of the bezel to allow gases to escape
during soldering.
Step 6
At this point the inner ring needs to be fitted. This ring
should be the proper finger size and slightly wider than the shank. It should
fit tightly into the ring shell to solder properly.
Step 7
All excess material is removed by filing and the surface is
finished as desired. The stone can now be set.
The tools for this project can be obtained at :
http://www.fretzdesign.com/
Bezel Forming Set
Hollow Ring Stake Kit
HMR-1 Plannishing Hammer
Also all instructions are available at Mr. William Fretz
webpage.
Paso 1
La estimación de
la longitud de la cubierta de una piedra ovalada y caña del tamaño deseado.
Para
calcular la longitud de la caña, hacer el siguiente cálculo:
Diámetro del dedo + grosor
de la lamina x PI (3,1416)
D + TD × π = tamaño de la sortija.
La estimación de
la longitud del bisel para una una piedra ovalada
Para
calcular la longitud del bisel de una piedra ovalada, haga el siguiente
cálculo:
Longitud + ancho
÷ 2 + espesor del metal x PI (3,1416)
L + W ÷ 2 + TM × π = OB
Después de
obtener en línea todos los cálculos se elaborará una plantilla de forma de H
para el anillo.
Transferir una
plantilla de anillo que es ligeramente menor que el bisel está utilizando al calibre
18 de la chapa. La plantilla puede estar
hecha de papel grueso primero y se pegan para refinar la forma del anillo.
Paso 2
La lámina de
metal se dobla con los alicates en la forma, teniendo cuidado de no deformar
los cuatro bordes más cortos. Estos bordes se sueldan juntos uno a la vez el
uso de soldadura dura.
Paso 3
El vástago del
anillo se redondea usando un mandril anillo. La abertura superior (donde su
bisel se sentará) se forma entonces a la forma deseada (oval en este caso) y estaca aplanadora utilizando la Estaca R-3
para Elevar.
Paso 4
Uso de la estaca
R-3, el vástago de anillo y los lados son abovedada. Para cúpula los lados, el
extremo redondeado de la estaca se inserta en la abertura superior del anillo y
aplanea gradualmente desde el exterior. A medida que los tramos de metal, lo
hará cúpula arriba. El vástago de anillo se forma de cúpula, formando el metal
que rodea el extremo redondo del juego.
Paso 5
El bisel está
listo para ser soldada en la parte superior del anillo. Puede que sea necesario
para refinar la forma y el tamaño de la abertura superior para acomodar el
bisel. Una vez que el bisel se ajusta herméticamente, se sueldan en su lugar.
No te olvides de hacer un agujero en la base de la cubierta para permitir el
escape de los gases durante la soldadura. ( ojo, este puede explotar)
Paso 6
En este punto el
anillo interior necesita para el montaje. Este anillo debe ser el tamaño de un
dedo adecuado y ligeramente más ancho que el vástago. Debe encajar
perfectamente en la carcasa de anillo para soldar correctamente.
Paso 7
Todo el material en
exceso se eliminara usando las limas, lija y otras herramientas de pulido y la
superficie estará terminada según se desee. La piedra se puede establecer en el bisel ahora.
Las herramientas
para este proyecto se pueden obtener en: http://www.fretzdesign.com/
Set para La
formación de bisel
Kit de Estacas
para anillo hueco
HMR-1 martillo
aplanador
Asimismo, todos
las Instrucciones están disponibles en la página web del Sr. William Fretz.


.jpeg)
.jpeg)
.jpeg)
.jpeg)
.jpeg)
.jpeg)
.jpeg)

.jpeg)
.jpeg)